How to Setup CloudPanel on a Debian 10 Server for Control Panel and Install Wordpress on The Panel
An open-source and cost-free server control panel called CloudPanel is best used on Debian Linux command-line servers to administer different web components, keep track of the system, and leverage other services like MySQL, NGINX, PHP-FPM, and Redis.
The popular WHM Cpanel is typically included with hosting packages, but we must pay extra. Therefore, users of public cloud platforms like Amazon Web Services, Digital Ocean, or Google Cloud familiar with the Linux operating system and command line can utilize free CloudPanel on various VPS hosting. The good news is that this open-source Linux server control panel has additional features that allow it to interact effectively with the public cloud services mentioned above and handle their numerous functions. For instance:
Directly visible on CloudPanel are the AWS Cloud Instance Name, Instance ID, Instance Type, Instance Region, and IPv4 Public IP. Similarly, we can manage Route 53 and Automatic Backups rules for AWS Security Groups directly from this control without accessing the AWS Management Console. Again, after installing CloudPanel, we can handle Droplets, Firewall Rules, DNS, and Snapshots on Digital Ocean and Google Cloud.
Not only that, but the CloudPanel also includes a web-based, graphical, and user-interactive Dashboard where we can access Users, Vhost Templates for all popular PHP Apps, Multiple PHP Versions, MySQL Databases including Amazon RDS or Amazon Aurora, Action Log, and more to lessen the hassle of issuing the various commands.
Additionally, CloudPanel provides a CLI tool that can run numerous essential commands on the server terminal, including those that enable Two-Factor Authentication, backup databases, reset passwords, and reset permissions.
It supports many other languages, including English, German, Spanish, Chinese, and Italian.
Key features:
- Web-based graphical Control Panel
- Easy to install
- Supports multiple PHP versions
- NGINX Support
- Major Public Cloud support
- Quick Let’s Encrypt Certificates setup
- Monitoring Graphs
- phpMyAdmin support to manage MySQL Databases
- Cron Jobs Management
- With one Click MySQL, NGINX, PHP-FPM, and Redis services can be restarted
- Command-line support
Steps to install CloudPanel on Debian 10 Buster server
Minimum Server Requirements:
- Debian server
- 2 GB Memory
- One Core CPU
- 15 GB free disk space
- root user or sudo access
- If there is an active firewall, then make sure ports 22, 80, 443, and 8084 are whitelisted or opened.
1. Run system update & upgrade
Run the system update and upgrade command on your Debian 10 (Buster) server to ensure all installed packages are in the most recent state possible.
sudo apt update
sudo apt upgrade
2. Install dependencies
Although the wget and curl tools are typically included by default with the Debian Server Linux distribution, you can check to ensure they are by running the following command.
sudo apt install wget curl
3. Install ClouPanel Script on Debian
Download and run the CloudPanel script to automatically install PHP, MySQL, Nginx, and other necessary components on Debian Linux for this open-source control panel.
curl -sSL https://installer.cloudpanel.io/ce/v1/install.sh | sudo bash
4. Create Admin User
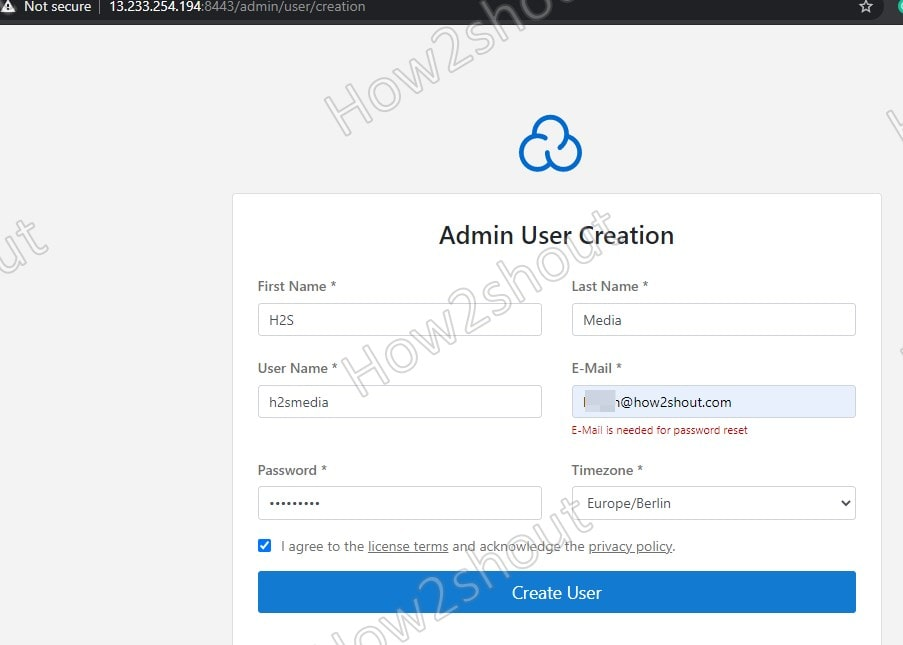
Your server's IP address and port will flash on the command line once the installation is complete. Simply type https://server-ip:8443 in the browser, replacing Server-IP with the IP address of the Debian server where CloudPanel is installed.
Enter the requested information.
Use the username and password created in the above steps to log in to the Control Panel.
6. Dashboard with Server Monitoring Graph
The first thing after login you will see is the graphs to give information about the Server resources usage such as Memory, CPU, Storage, and Average Load.
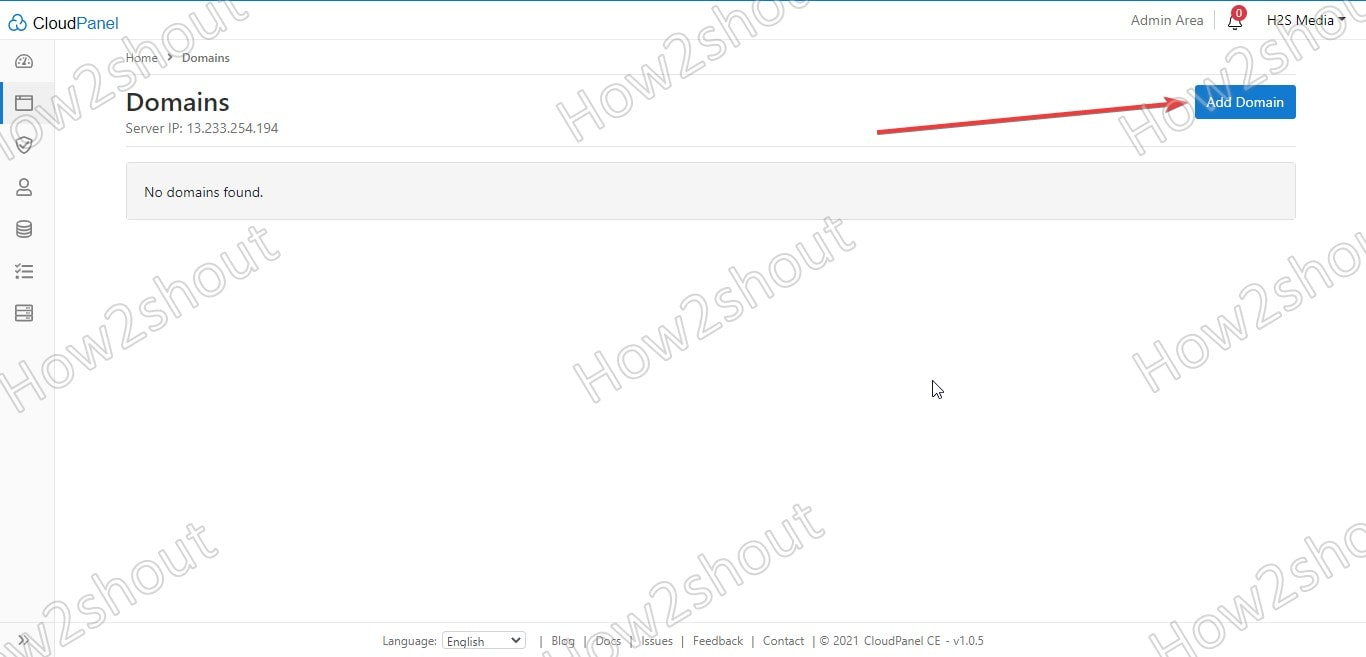
Now, we have Linux Server and CloudPanel control panel, it’s time to add a domain that we want to use with it. Click on the Domain option given on the left side of the Dashboard.
After that click on the “Add Domain” button.
The Document root will be automatically set; you don't need to do anything there. Type your domain name in the "Domain Name" field.
The next step is to choose a Vhost template. There are a variety of pre-built templates available for all well-known PHP applications, including Joomla, WordPress, Magento, and others. WordPress is the option we have here. Choose a specific PHP version if you want to utilize it; otherwise, choose the most recent version, which in this case is PHP 8.0.
Make sure your DNS administration area has your Debian server's or CloudPanel's IP address pointing at the domain name you use for CloudPanel's "A" record.
Once the domain is configured, click on the name of the domain and choose the SSL certificates Tab. The "New Let's Encrypt Certificate" option must be selected after clicking the Action button to see additional options.
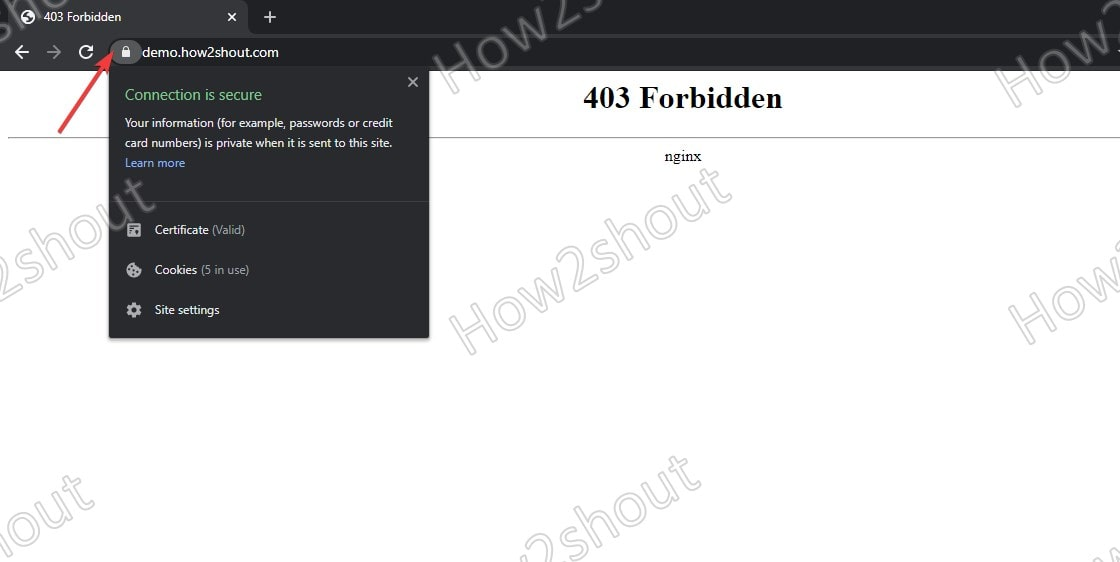
Let's check to see if our newly generated domain can be accessed using the Nginx web server and SSL certificate that we also created. Simply enter the domain that CloudPanel issued to you in the browser to get the result shown below.
The process for installing WordPress on CloudPanel is now complete. For this, you can either directly connect to your server's command-line interface if it's installed on a local server, or you can use SSH if it's installed on a remote server or in the cloud.
1. On the terminal, switch to the Temp folder.
cd /tmp
2. Download Wordrpess file
wget https://wordpress.org/latest.tar.gz
3. Extract the WordPress tar file
tar xvf latest.tar.gz
4. Move extracted files of WordPress to your domain document root.
sudo cp -R wordpress/* /home/cloudpanel/htdocs/www.domain.com/
Note: replace www.domain.com with your domain name set in CloudPanel.
5. Change the permission of the moved file
cd /home/cloudpanel/htdocs/
clpctl system:permissions:reset www.domain.com 775
Note: replace www.domain.com with your domain name used in this control panel
Create MySQL Database
It's quite simple to create a database for PHP and other CloudPanel applications. Simply choose the Databases option and press the Add Database button on the Admin frontend interface.
Complete all required fields, including Database Name, Username, and Password, and then click the Add Database button. I'm done now.
Access WordPress Setup page
Now that everything is in its proper position and "WordPress" has been installed, it is time to access it. Access your domain that you set in Cloudpanel to install WordPress for that purpose once more in your browser.
1. The WordPress homepage
To begin the installation procedure, click the Let's go button.
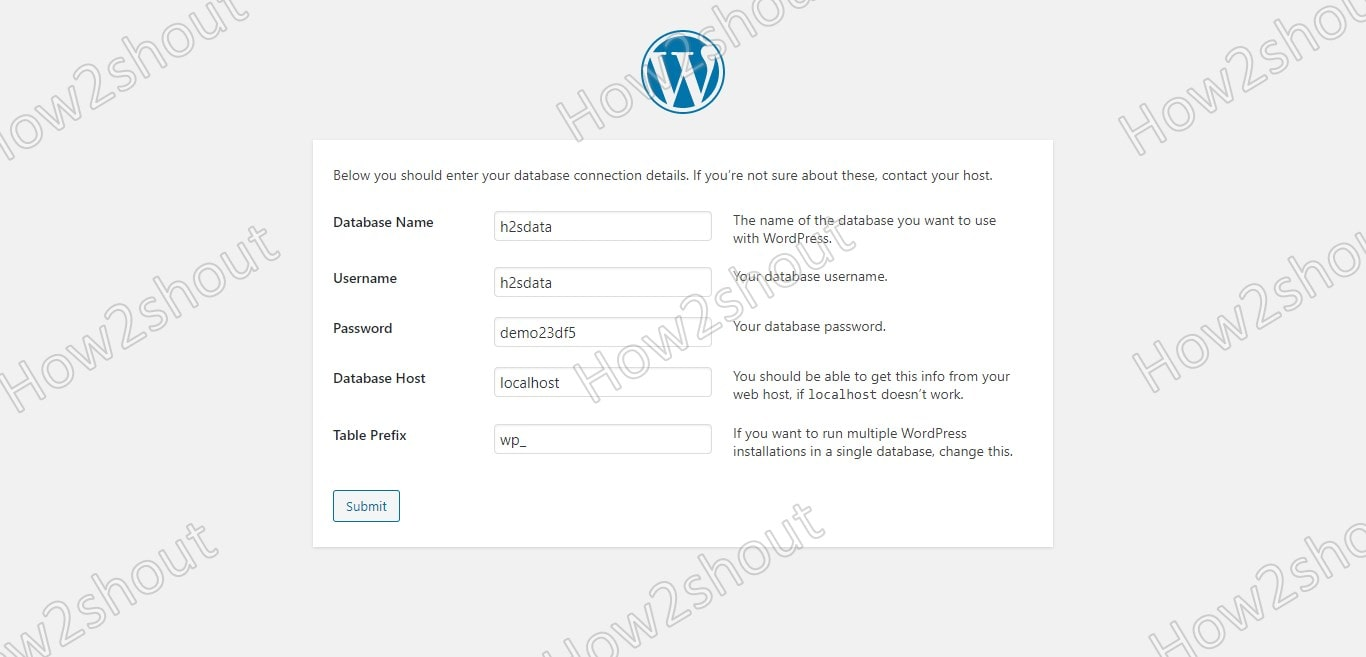
2. Add Database Information
Use the information from that MySQL database when WordPress requests it since we have already built it. Database Host and Table Prefix should remain unchanged. Enter of the MySQL database
3. Start installation
If you are here, then everything has already disappeared. Exceptional, press the "Run the Installation" button.
4. Create a user on WordPress
To access the backend login page, create a user and password. For WordPress on Cloud, create a user name and password.
The CloudPanel Control Panel was thus quickly installed on the Debian Linux server using this method. You can restart any currently operating services right from the CloudPanel Dashboard if you need to. The platform's official documentation page has further information on it.


Join the conversation