How to Use Etcher to Write an ISO Image File to a USB Flash Drive

|
| How to Use Etcher to Write an ISO Image File to a USB Flash Drive |
You must first copy the ISO image file to the media to install an operating system from USB or flash storage.
But more than replicating anything, the old-fashioned method is required. For the ISO file to boot, specialized software for creating ISO files is needed.
Although the feature is incorporated into operating systems, it is challenging for Etcher from Balena steps in at that point. Regardless of your operating system, this instruction will teach you how to use Etcher to write an ISO file to a USB.
How Should I Write an ISO to a USB Drive?
Copying an ISO or IMG disk image to a USB or SD flash card varies depending on the operating system. For instance, disk images can be created from Linux, macOS, and Windows systems. After that, you can use it to image one or more new PCs as a backup.
In the interim, you can use Linux and macOS's dd program to write data on a USB stick.
Many users regard the dd command as the best method for writing a disk image to a USB drive or other flash storage.
Etcher is a fantastic piece of software, but it's available if you use Windows or don't want to fiddle about in the terminal.
This desktop application makes it simple, simple to use, and mouse-controlled to create a bootable USB or SD card from an ISO or IMG file. Additionally, it supports all desktop operating systems. Knowing how to utilize Etcher can help you save time while writing data to a USB or SD flash drive.
Etcher, created by Balena, is a free download for Linux (32-bit and 64-bit AppImage), Windows (installed and portable), and macOS.
Download Etcher.
Click the Download button only once. The website will detect your OS system, ensuring you download the correct version.
You must install Etcher on Windows and Mac. Users of Linux systems that support AppImage files can launch Etcher by simply double-clicking the downloaded file.
Flash a USB or SD with an ISO file. Using a Flash Etcher
To convert an ISO file that has been downloaded to your computer into a bootable USB stick or SD card:
- Put the SD card in the card reader or connect the USB stick.
- Start Etcher
- To open a Flash file, click.
- Look through the downloaded ISO file on your PC.
- Click OK after selecting the file.
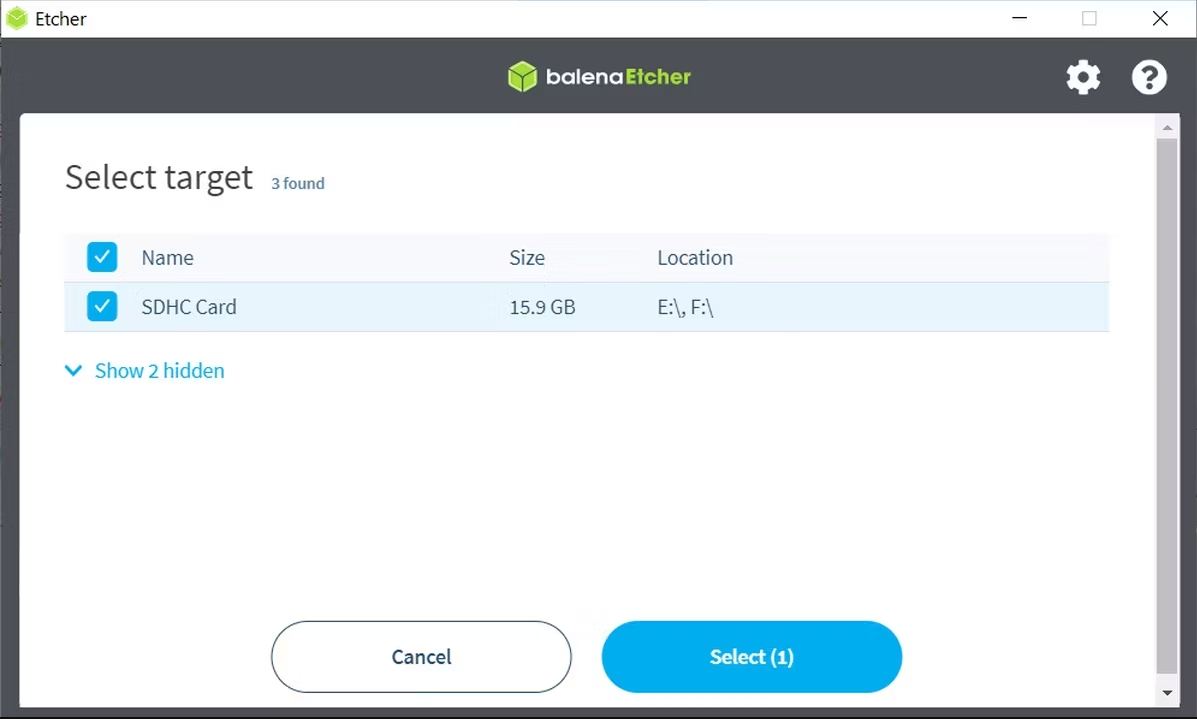
- then click Pick a target
|
| Balena Etcher |
- Choose a target to flash.
- Locate the SD or USB card.
- Input OK.
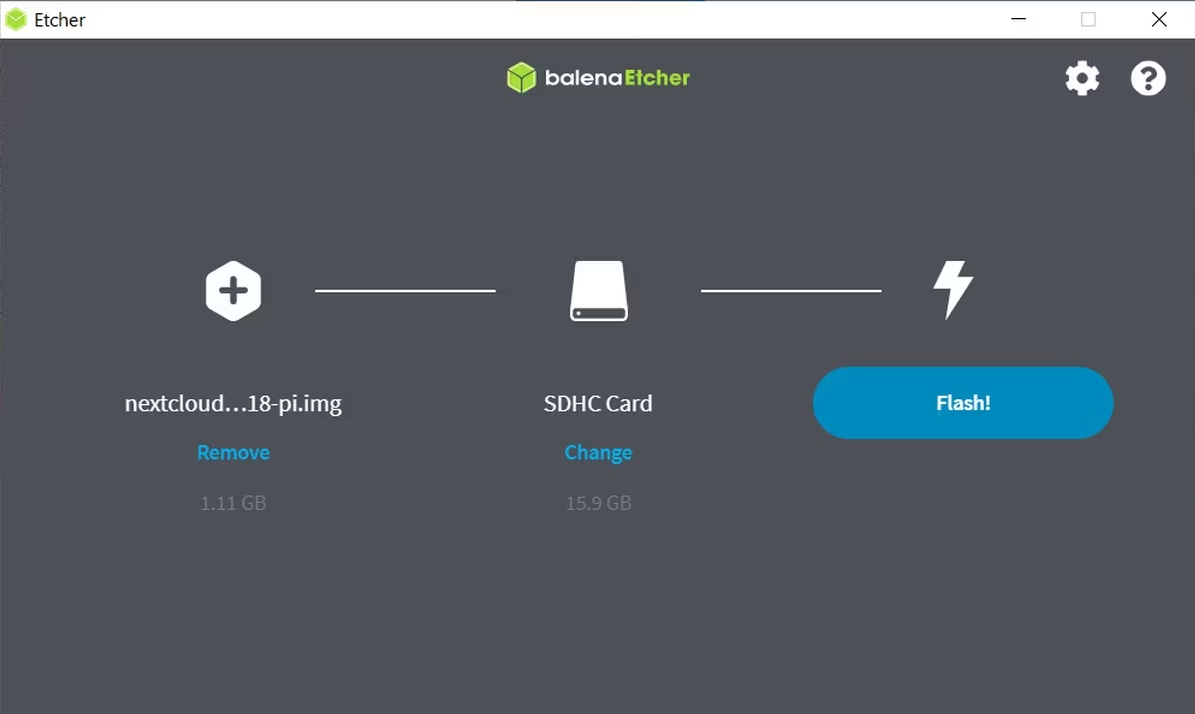
- Flash, please
|
| Balena Etcher |
Use Etcher to write ISO to a USB.
The ISO file will then be written to the chosen medium by Etcher. There will also be a verification stage, so please hold off until that is finished.
When the procedure is over, the app will let you know. The USB stick or SD card should then be ejected.
How to Use Etcher to Download an ISO File and Write It to a USB
On occasion, the ISO file won't be present on your PC. It will instead be accessible as a downloaded file.
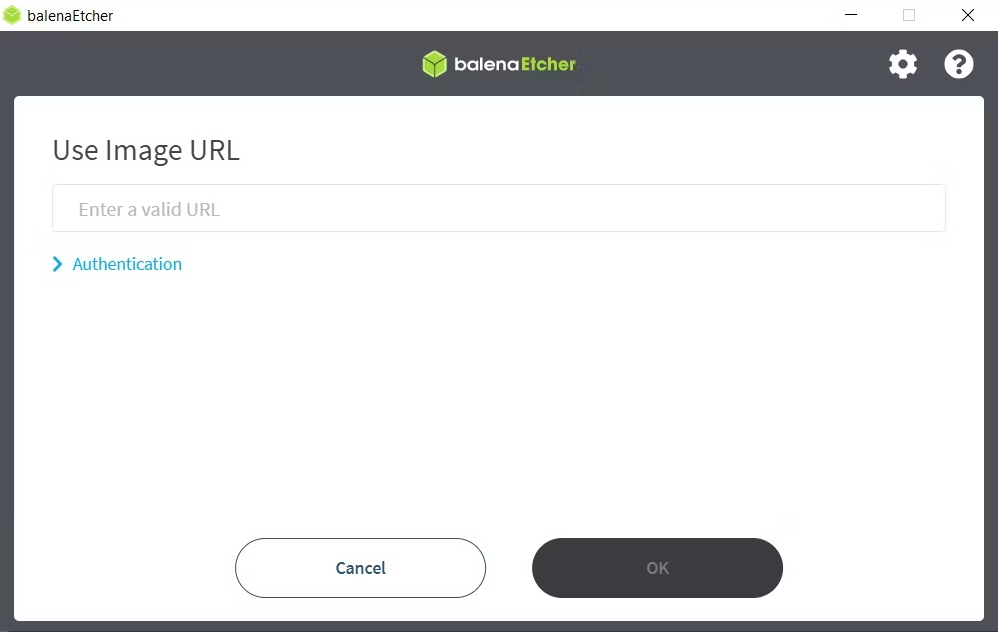
You can ask Etcher to download the file directly from the internet and write it to your USB or SD card instead of first downloading it to your PC.
- Open your browser to the website where the URL for the ISO file is provided.
- Put a USB stick in the card reader or an SD card.
- Start Etcher
- Flash from the URL, click
|
| Balena Etcher |
- copying an ISO file from a website to a USB
- Put the file's URL in the field marked "Enter valid URL."
- Click Authentication and enter a username and password if credentials are needed.
- Input OK.
- select a target by clicking
- Find the USB or SD card by browsing
- Flash after selecting OK.
Only attempt to eject the USB or SD flash media once the procedure is finished.
Utilize Etcher to Copy a Flash Drive for Backups Quickly
With Etcher, you may make ISO files and write to them. This can be used to back up a USB flash drive or to create a disk image of the SSD in your computer. Even the SD card of a Raspberry Pi might be backed up using Etcher's clone capability.
Make sure the drive you're writing to can hold the contents of the source drive before you do anything else. Make sure your PC is linked to both devices as well. Then:
- Start Etcher
- Press Clone Drive.
- Select Clone a disk image in Etcher by selecting the source drive radio option.
- select a target by clicking
- Select the desired USB or SD card.
- Flash after selecting OK.
Hold off till the procedure is over. Patience is vital in this situation, especially if you want to clone an internal SSD. After the operation, the target drive will have an exact copy of the source disk. For instance, in the event of a failure, this can be used to recover the disk.
Examining the Settings Screen for Etcher
Etcher offers a few more parameters besides the three core ISO-creation features. By clicking the cog in the top-right corner of the program window, you may get to these.
Etcher parameters
A privacy setting is the first of these options. However, Etcher is set up by default to anonymize faults and usage information to balena.io. You can disable this.
The updates setting is the other option. Setting Auto-updates enabled to protect you from flaws and vulnerabilities that the program may include by ensuring it is always up to date.
The Best ISO to USB Writer is Etcher.
You've come to the right place if you're looking for the best method for writing an ISO file to a USB or SD flash device. Etcher makes the procedure incredibly easy, typically taking only five mouse clicks.
Everyone needs Etcher because it can flash from a downloaded file, an internet file, or even clone a flash storage device and produce an ISO file from it. Even if you might use Etcher sparingly, it always fulfils your needs when you do.
However, you cannot mount or view an ISO disk image using Etcher. However, that's fine because your operating system should handle that.
Join the conversation